

How to Get Rid of Mold Smell in Your Car Naturally
White vinegar, baking soda, thorough vacuuming, and targeted drying handle most natural mold smell car situations when you pair them with finding and fixing the moisture source. Skip the source, and the smell comes back within days. Here’s what to do right now:
- Remove any wet items from the car immediately (towels, umbrellas, gym bags).
- Vacuum every surface with a HEPA-filter or strong shop vacuum, including under seats and floor mats.
- Sprinkle baking soda on carpets and upholstery; leave it overnight to absorb odor.
- Wipe hard surfaces with a 1:1 white distilled vinegar and water solution.
- Run the fan on high with the AC turned off for several minutes before shutting the car off.
Pro Tip: The fan-on-high-with-AC-off habit is the single most underused trick for musty car smells. Do it every time you park, and you cut evaporator moisture dramatically.
Wear an N95 mask before you start if the smell is strong or you can see any fuzzy spots. Mold spores become airborne the moment you disturb them.
Key Takeaways
Natural mold smell removal in a car requires fixing the moisture source first, then cleaning with vinegar and vacuuming, drying completely, and using fragrance only after remediation is confirmed complete.
| Point | Details |
|---|---|
| Fix moisture first | No cleaning method works long-term if the leak, clog, or wet item causing dampness isn’t removed first. |
| Vinegar and vacuum sequence | Apply white distilled vinegar to fabrics, let it dwell 10–15 minutes, then extract moisture with a wet/dry vacuum. |
| HVAC drying habit | Run the fan on high with AC off for 3–5 minutes before shutting off to dry the evaporator and prevent recurring odors. |
| Replace the cabin air filter | A moldy filter re-contaminates every breath of conditioned air; replace it as part of any mold remediation. |
| Fragrance last, not first | Voidescent scent hangers (Heavens, Descent) are appropriate only after cleaning and drying are fully complete. |
Table of Contents
- What causes that musty mold smell in your car?
- How do you know if it’s mold and not just a stale smell?
- Step-by-step natural removal: how to clean mold out of your car
- What can you do about mold smell coming from your car’s AC?
- How do you keep mold smell from coming back?
- Common mistakes that make mold odor worse
- When should you call a professional instead of doing it yourself?
- When is it safe to use natural fragrances after mold removal?
- A word on remediation before fragrance
- Voidescent: botanical scent for a car you’ve already cleaned
- Sources
What causes that musty mold smell in your car?
Knowing the source is half the battle. Masking the odor without fixing the root cause is a short-term fix that always fails.
The usual suspects, in rough order of how often they’re responsible:
- HVAC evaporator and ducts. The evaporator coil sits behind the dashboard in a dark, perpetually damp housing. Every time you run the AC, condensation forms on it. The AC evaporator and clogged drain tubes are among the most overlooked causes of persistent musty odors because that environment is warm, dark, and wet — perfect for mold.
- Cabin air filter. A clogged or old filter traps moisture, dust, and organic debris. Mold colonizes it quickly, and every breath of conditioned air passes right through it.
- Carpet padding and seat foam. The surface fabric dries fast; the padding underneath holds moisture for days. You can press the carpet and feel nothing on top, yet the foam below is still saturated.
- Forgotten wet items. A damp towel left under a seat for 48 hours is enough. Mold can begin growing in as little as 24–48 hours when moisture and organic material are present.
- Leaks. Sunroof drains, door seals, windshield seams, and blocked drain tubes all funnel water into the cabin floor. The carpet soaks it up silently.
| Source | Location in car | Natural first-line fix |
|---|---|---|
| HVAC evaporator | Behind dashboard, inside AC housing | Fan-on-high/AC-off drying habit; cabin filter replacement |
| Cabin air filter | Filter housing near glove box | Replace filter; vacuum housing |
| Carpet and padding | Floor, under mats and seats | Extract moisture, HEPA vacuum, vinegar treatment, dry 24–72 hours |
| Seat foam | Seat cushions and backs | Vinegar spray, agitate gently, extract, dry with fan |
| Leaks and drain tubes | Sunroof corners, door sills, firewall | Clear drain tubes; seal leak source before cleaning |
| Forgotten wet items | Under seats, trunk | Remove immediately; treat affected surface |
How do you know if it’s mold and not just a stale smell?
Mold and plain staleness smell similar at first, but a few signals separate them.
Sensory signs:
- A damp, basement-like odor the moment you open the door
- Smell that peaks sharply when the AC first kicks on, then fades slightly
- Musty odor that gets stronger when you press on the carpet or seat
- Visible fuzzy patches, dark spots, or discoloration halos on fabric or trim
Physical signs:
- Carpet or seat fabric that feels slightly damp even days after any rain or spill
- Staining that reappears after surface cleaning
Health signals to take seriously:
- Sneezing, eye irritation, or a runny nose that clears up when you leave the car
- Worsening asthma or allergy symptoms during or after a ride
- Headache or fatigue that correlates with time spent in the vehicle
If you or a passenger experience respiratory symptoms inside the car, or if you can see mold spreading across multiple surfaces or inside the vents, stop DIY work and call a professional remediation service. Widespread mold in an enclosed vehicle is a health hazard, not a cleaning project.
Immediate precautions before you start any cleanup:
- Open all doors and windows to ventilate the cabin for at least 10 minutes.
- Ask passengers, especially children or anyone with asthma, to stay out of the car.
- Put on an N95 respirator and nitrile gloves before touching anything.
Step-by-step natural removal: how to clean mold out of your car
The full protocol is: find the source, remove it, kill surface mold with vinegar, extract moisture from padding, dry completely, then absorb residual odor with baking soda. Effective remediation follows a three-part sequence: kill the spores, remove the stain and odor, then eliminate the moisture source to prevent recurrence.
-
Investigate first. Lift every floor mat. Press the carpet firmly with your palm and check for dampness. Check the sunroof drain tubes (usually in the corners of the sunroof frame) by pouring a small amount of water in and watching whether it drains or pools. Inspect the cabin air filter housing for visible mold or debris.
-
Fix the moisture source. If a drain tube is clogged, clear it with a flexible brush or compressed air. If a seal is cracked, address it before cleaning. Cleaning without stopping the source is wasted effort.
-
HEPA vacuum everything. Vacuum seats, carpets, mats, and crevices before applying any liquid. Vacuuming first removes loose spores and debris so your cleaning solution reaches the surface rather than sitting on top of particulate.
-
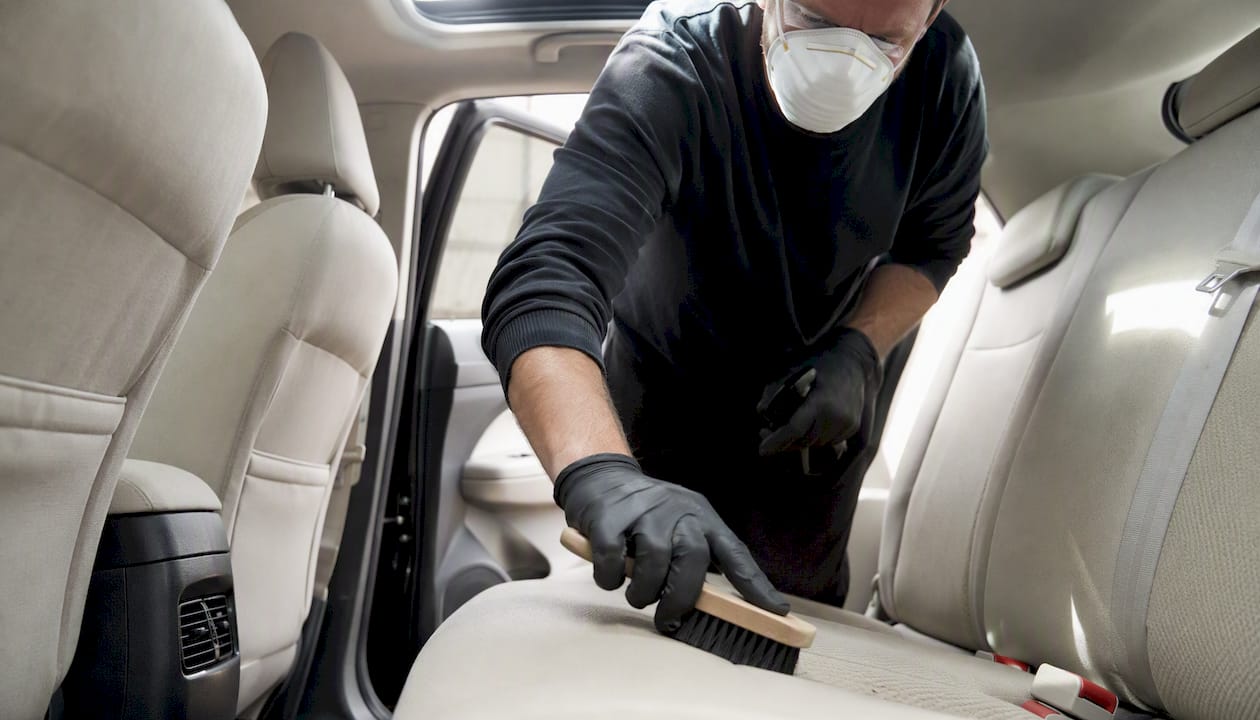
Apply white distilled vinegar to fabrics and carpets. White distilled vinegar is an effective natural mold-killing agent for many common vehicle interior molds and is a safe first-line treatment when used carefully. Mix equal parts vinegar and water in a spray bottle. Mist the affected area, let it dwell for 10–15 minutes, then agitate gently with a soft brush.
-
Extract moisture from padding. Surface blotting alone won’t reach saturated foam. Use a wet/dry vacuum or rent a carpet extractor to pull moisture from the padding. Without extraction, odors can return despite thorough surface cleaning. Expect 24–72 hours of drying time depending on how saturated the padding is.
-
Follow with an enzyme cleaner (after vinegar dries). Enzymatic cleaners break down the organic residue that remains in foam or fabric after mold is killed. Apply only after the vinegar has fully dried so the two don’t neutralize each other.
-
Wipe hard surfaces. Door panels, center console, and plastic trim get a wipe-down with the vinegar solution. Scrub crevices with an old toothbrush, then dry completely with a microfiber cloth.
-
Apply baking soda for overnight odor absorption. Sprinkle generously on carpets and seats, leave overnight, then vacuum out. For longer-term absorption, place activated charcoal sachets or silica gel packs under the seats.
Pro Tip: Don’t mix cleaners. Let vinegar do its full dwell time before introducing any enzyme product. Over-wetting is the other common mistake — a damp surface is the goal, not a soaked one.
Safety note: wear your N95 and gloves throughout. Avoid agitating mold aggressively without vacuuming first, or you’ll spread spores to clean surfaces.
| Area | Accessibility | Best natural first aid | When DIY likely fails |
|---|---|---|---|
| Surface fabric | Easy | Vinegar spray, gentle scrub, dry | Staining is deep or smell returns after drying |
| Padding and foam | Moderate | Extraction, vinegar, extended drying | Foam is crumbling or saturated beyond extraction |
| HVAC and evaporator | Difficult | Filter replacement, drying habit, vent spray | Mold visible inside vents or on evaporator coil |
What can you do about mold smell coming from your car’s AC?
The evaporator is the most common hidden source of vent odor, and it’s the hardest to reach without tools. Natural mitigation is possible but limited to a few specific steps.
- Replace the cabin air filter first. It’s the easiest win. A moldy filter pumps contaminated air through every vent every time the fan runs. Most filters are accessible behind the glove box without any tools.
- Use the HVAC drying habit consistently. Running the vehicle’s fan on high with the AC turned off for several minutes before shutting off helps dry the evaporator and reduce musty AC-related odors. Make this a habit every time you park.
- Run heat cycles. After replacing the filter, run the fan on high heat for a few minutes with windows cracked. Heat dries residual moisture in the duct system.
- Clear debris from intake vents. The fresh-air intake (usually at the base of the windshield) collects leaves and organic debris. Clear it with a brush or compressed air so it doesn’t feed mold into the system.
- Check and clear drain tubes. The evaporator drain tube exits under the car near the firewall. If it’s clogged, condensation backs up into the housing. A flexible brush or a blast of compressed air usually clears it.
Pro Tip: After completing interior cleaning, run the fan on recirculate for a few minutes with baking soda placed near the intake. Then vacuum out any loose residue from the floor vents. It’s a low-effort way to help the absorber work through the duct path.
How do you keep mold smell from coming back?
Prevention is simpler than remediation. The most effective trio: dry the interior thoroughly after any moisture exposure, remove wet items immediately, and use passive desiccants year-round.
- Remove wet clothing, towels, umbrellas, and sports gear from the car the same day.
- Park in sunlight or a ventilated area when possible — UV light and airflow both suppress mold growth.
- Run the HVAC drying habit (fan high, AC off) every time you park after using the AC.
- Replace the cabin air filter every 15,000–25,000 miles or once a year, whichever comes first.
- Clean sunroof drains and door sill drains seasonally — a small brush and water takes five minutes.
- Place silica gel packs or activated charcoal sachets under the seats and in the trunk. Swap them out every 4–6 weeks.
For RV and larger vehicle owners dealing with similar enclosed-space odor challenges, odor-free vehicle living tips cover desiccant placement and ventilation strategies that translate directly to car interiors.
Pro Tip: Once the car is fully dry and remediated, a Voidescent scent hanger placed near the headrest (not near the vents if the HVAC was recently treated) keeps the cabin smelling clean without pushing fragrance into areas that may still be drying. Fragrance is the final step, never the first.
Common mistakes that make mold odor worse
The fastest way to make a mold problem worse is to mix cleaning chemicals or soak the interior without a plan to dry it.
Mistakes to avoid:
- Using bleach on fabric or carpet. Bleach damages fibers, leaves residue, and doesn’t outperform vinegar on most interior mold species. It also creates fumes in an enclosed space.
- Scrubbing without vacuuming first. Agitating mold without removing loose spores first spreads contamination to clean areas.
- Skipping the drying step. Stopping the moisture source and drying completely is the most reliable way to eliminate mildew odor. Surface cleaning alone often fails when padding remains damp.
- Ignoring the HVAC system. Cleaning every surface in the cabin and leaving a moldy evaporator or filter untouched means the smell returns through the vents within days.
- Over-wetting the interior. Applying too much liquid without extraction creates the exact moisture conditions mold needs to regrow.
Never mix vinegar and bleach, or bleach and ammonia-based cleaners. The chemical reactions produce toxic gases in a confined space. Use one cleaner at a time, and let each dry fully before applying the next.
Safety checklist:
- Wear an N95 respirator and nitrile gloves throughout.
- Keep doors and windows open during the entire cleaning process.
- Avoid running a space heater inside a closed car to speed drying — ventilate instead.
- If a child, pregnant person, or someone with asthma has been regularly riding in the car, escalate to professional remediation rather than DIY.
When should you call a professional instead of doing it yourself?
Call a pro when the smell returns after a thorough DIY attempt, when visible mold appears inside vents or behind the dashboard, or when anyone in the car is experiencing health reactions.
Red flags that mean DIY isn’t enough:
- Musty smell returns within a week of cleaning and drying
- Visible mold growth inside vents, on the evaporator housing, or behind trim panels
- Carpet padding that’s crumbling, discolored, or won’t dry after 72 hours
- Water pooling in the footwell or trunk with no obvious source
- Respiratory symptoms (coughing, wheezing, eye irritation) that correlate with time in the vehicle
What a professional will do:
- Access and deep-clean or replace the evaporator coil and housing
- Remove and replace saturated padding and foam
- Apply ozone or thermal remediation to kill mold in unreachable areas
- Diagnose and repair the structural leak or drain failure causing moisture intrusion
- Verify dryness with a moisture meter before reassembly
On cost: professional auto mold remediation in the United States typically ranges from a few hundred dollars for targeted treatment to over $1,000 for full interior removal and replacement, depending on the extent of damage and the shop. Get an itemized estimate before authorizing work, and ask specifically whether the moisture source is included in the diagnosis.
Frequently asked questions:
Can I just use an ozone machine myself? Ozone generators can be rented, but they require the car to be completely unoccupied and sealed during treatment, and residual ozone is harmful to breathe. Professional operators know safe exposure times and concentrations. DIY ozone use is a risk most car owners should avoid.
How long does professional mold remediation take? Most jobs run one to three days, depending on whether padding and foam need to be replaced and how long drying takes.
When is it safe to use natural fragrances after mold removal?
Fragrance belongs at the end of the process, not the beginning. Using a scent product before the source is removed and the interior is dry only masks the problem while mold continues to grow underneath.
Safe post-remediation scenting options:
- Activated charcoal or botanical sachets. These absorb residual odor passively and are appropriate to leave in place long-term.
- Voidescent scent hangers. After remediation is complete and the interior is confirmed dry, a botanical scent hanger like Heavens or Descent provides a slow-release, eco-friendly fragrance that lasts four to six weeks without synthetic chemicals.
- Essential oil on a cotton pad. A few drops of tea tree or eucalyptus oil on a cotton pad placed under a seat offers mild, natural scenting. Replace weekly.
Pro Tip: If the HVAC system was recently treated, place scent products near the headrest or in the trunk rather than directly at the vents. Pushing fragrance into a duct that’s still drying can trap scent in damp areas and complicate the drying process.
A scent product is not remediation. It will not kill mold, dry padding, or fix a leaking sunroof drain. Use it only after the cleaning and drying sequence is fully complete.
A word on remediation before fragrance
Most car owners reach for an air freshener the moment they notice a musty smell. That instinct is understandable, but it’s exactly backward. Fragrance layered over active mold doesn’t neutralize anything — it creates a sweet, musty hybrid smell that’s arguably worse, and it delays the moment you actually fix the problem.
The articles and guides that get this right all share one structure: find the moisture, kill the mold, extract and dry, then — and only then — consider how you want the cabin to smell. Voidescent’s botanical scent hangers are genuinely well-suited to that final step. They’re slow-release, they don’t dump a synthetic blast of fragrance that fades in a week, and the botanical formulas don’t introduce harsh chemicals into a space you’ve just spent effort cleaning naturally. But they’re an adjunct, not a solution.
The other thing worth saying: the HVAC drying habit from Consumer Reports is probably the single most underused piece of car maintenance advice in circulation. It costs nothing, takes three minutes, and prevents the most common source of recurring musty odors. Most people have never heard of it.
Voidescent: botanical scent for a car you’ve already cleaned

Once the mold is gone and the interior is dry, the cabin deserves something better than a synthetic pine tree dangling from the mirror. Voidescent’s botanical scent hangers are built for exactly this moment: post-remediation, clean interior, ready for a fragrance that lasts.
Heavens is a light, airy botanical profile suited to cars where you want the scent to feel like fresh air rather than a product. Descent runs darker and more complex, a slow-release fragrance that evolves over four to six weeks. Both use eco-friendly ingredients with no harsh synthetic compounds, which matters when you’ve just finished a chemical-free remediation and don’t want to undo that work.
Voidescent backs every purchase with a money-back guarantee. Browse the full range at Voidescent and pick the profile that fits your car. Fragrance is the last step — make it one worth keeping.
Sources
The following sources back the main claims in this guide:
- How To Clean Mold Out Of A Car Interior — The Complete Guide - Vehicle Seeks
- How to Clean Mildew Out of Car: Safe Steps That Work - CleaningBro
- How Do You Remove Mold and Fungus from Car Interiors, Upholstery, and Surfaces? - AutoDetailPedia